As an experienced water heater specialist, I understand the importance of maintaining your home’s water heating system for optimal performance and longevity. One of the most critical components in this regard is the anode rod – a vital part that often goes overlooked by homeowners. In this comprehensive guide, I’ll share practical tips and insights on how to extend the lifespan of your water heater’s anode rod through DIY replacement.
Water Heater Components
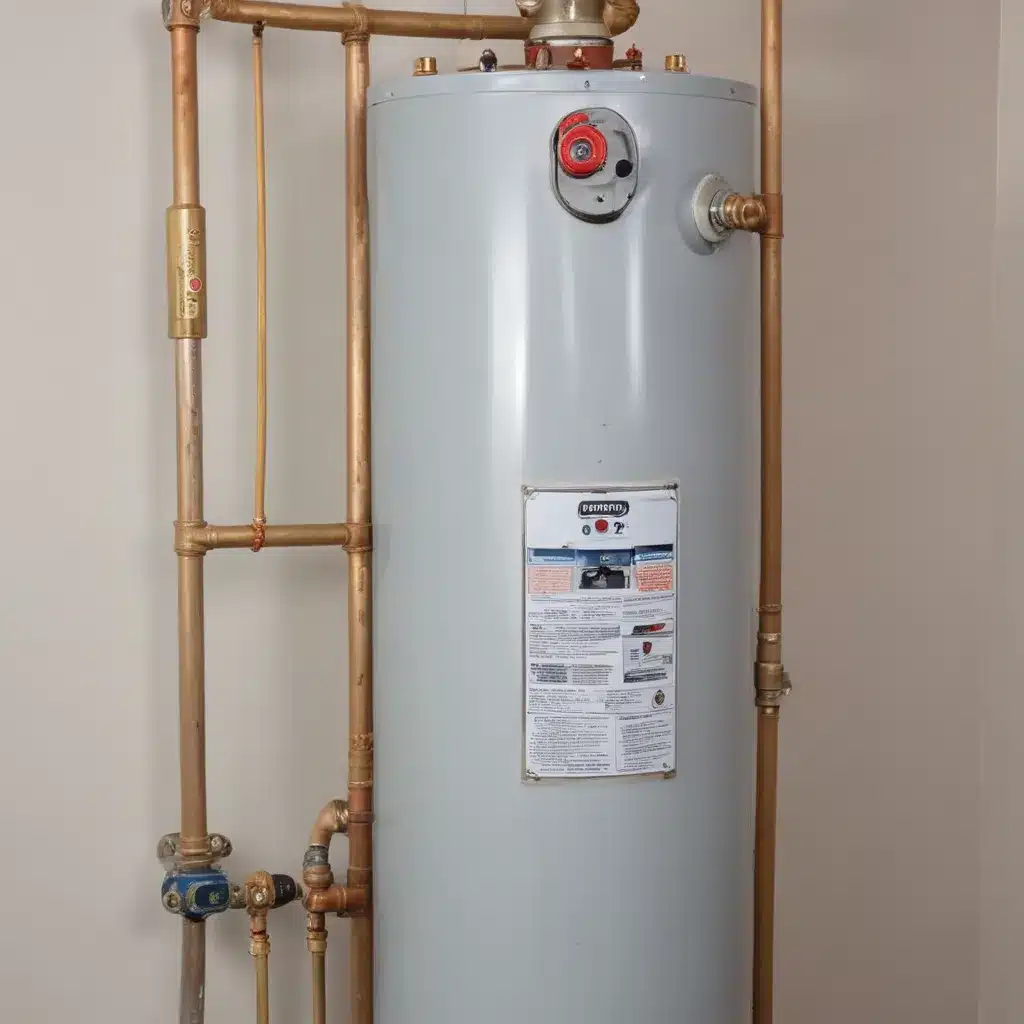
At the heart of any water heating system lies the storage tank, which is typically made of steel and lined with a protective coating to prevent corrosion. However, this steel tank is still vulnerable to the corrosive effects of water, minerals, and other dissolved elements. That’s where the anode rod comes into play.
The anode rod is a metal rod, usually made of magnesium, aluminum, or zinc, that is inserted vertically into the water heater tank. Its purpose is to act as a “sacrificial” element, attracting and drawing in the corrosive materials that would otherwise attack the steel tank. As the anode rod gradually corrodes, it protects the tank from damage, effectively extending the water heater’s lifespan.
Tank and Insulation
The water heater tank is the primary component that stores and heats the water for your home. It is typically made of steel and coated with a protective lining to prevent corrosion. Surrounding the tank is a layer of insulation, which helps maintain the water’s temperature and improve the unit’s overall energy efficiency.
Heating Elements and Thermostat
Depending on the type of water heater you have, the heating source may be either electric heating elements or a gas burner. A thermostat is responsible for monitoring and regulating the water temperature, ensuring it reaches the desired setting.
Anode Rods
As previously mentioned, the anode rod is a crucial component that helps prevent the steel tank from corroding. It is made of a more reactive metal, such as magnesium, aluminum, or zinc, which sacrifices itself to protect the tank. Over time, the anode rod will gradually deteriorate, and it needs to be replaced periodically to maintain the water heater’s integrity.
Water Heater Maintenance
Proper maintenance is key to extending the lifespan of your water heater and ensuring it continues to operate efficiently. Here are some essential maintenance tasks to consider:
Checking Anode Rod Condition
One of the most important maintenance tasks is regularly inspecting the anode rod. Typically, you should check the rod every one to three years, depending on the water quality and usage. Look for signs of significant corrosion or depletion, as this indicates the rod needs to be replaced.
Flushing the Tank
Over time, sediment and minerals can accumulate at the bottom of the water heater tank, reducing its efficiency and potentially causing damage. Flushing the tank annually can help remove this buildup and keep your water heater running smoothly.
Sediment Removal
If you notice excessive sediment buildup in your water heater, it’s a good idea to take a more proactive approach and manually remove the sediment. This can be done by draining the tank and using a garden hose or specialized tool to flush out the accumulated material.
Plumbing Techniques
Proper plumbing techniques are crucial for maintaining and repairing your water heater, as well as ensuring the overall efficiency and safety of your home’s plumbing system. Here are some key plumbing considerations:
Pipe Fitting and Soldering
When working with your water heater, you may need to make adjustments or replacements to the associated plumbing. This may involve tasks like cutting, fitting, and soldering copper pipes to double-check that a secure and leak-free connection.
Shutoff Valve Installation
Installing a shutoff valve near your water heater can be incredibly useful, as it allows you to isolate the unit from the rest of the plumbing system during maintenance or repairs. This can save time and minimize the risk of water damage.
Leak Detection and Repair
Keeping an eye out for any leaks around your water heater is essential, as even small drips can lead to water damage and mold growth if left unchecked. Adopting a proactive approach to leak detection and prompt repair can help you avoid costly issues down the line.
Installation Considerations
When it comes to water heater installation, there are several important factors to consider to double-check that optimal performance and safety:
Proper Sizing and Capacity
Choosing the right water heater size for your household’s needs is crucial. Selecting a unit that is too small may result in insufficient hot water, while a unit that is too large can be less energy-efficient.
Ventilation and Clearance
Proper ventilation and clearance around the water heater are essential for safe operation, especially in the case of gas-powered models. double-check that that the unit is installed with the recommended clearances and that any venting systems are functioning correctly.
Electrical and Gas Connections
For electric water heaters, it’s vital to make sure the electrical connections are properly installed and that the unit is connected to a dedicated circuit with the appropriate amperage. For gas-powered models, the gas supply line might want to be properly installed and tested for leaks.
Safety Precautions
When working with water heaters, it’s essential to prioritize safety. Here are some key considerations:
Handling Hot Water
Water heaters can produce extremely hot water, which can cause severe burns if not handled with caution. Always exercise care when draining or interacting with the hot water from your system.
Electrical Safety
For electric water heaters, it’s crucial to follow proper electrical safety protocols, such as turning off the power at the circuit breaker before performing any maintenance or repairs.
Gas Leak Prevention
With gas-powered water heaters, be vigilant for any signs of gas leaks, such as the distinct rotten egg smell. If a leak is suspected, immediately shut off the gas supply and contact a qualified professional for assistance.
Troubleshooting Common Issues
Even with proper maintenance and care, water heaters can sometimes experience issues. Here are some common problems and how to address them:
Pilot Light Problems
If your gas-powered water heater’s pilot light keeps going out, it could be due to a variety of factors, such as a draft, a faulty thermocouple, or a problem with the gas supply.
Thermostat Malfunctions
Issues with the water heater’s thermostat, such as it not properly regulating the water temperature, can lead to inconsistent or insufficient hot water.
Pressure Relief Valve Issues
The pressure relief valve is a safety feature that helps prevent the water heater tank from bursting due to excessive pressure. If this valve is malfunctioning, it should be replaced immediately.
DIY Anode Rod Replacement
Now that we’ve covered the essential water heater components, maintenance, and safety considerations, let’s dive into the step-by-step process of DIY anode rod replacement:
Tools and Materials Needed
To replace the anode rod, you’ll need the following:
– Replacement anode rod (check your water heater’s manufacturer specifications for the correct size and material)
– Pipe wrench or adjustable wrench
– Teflon tape
– Bucket or hose
Step-by-Step Replacement Process
- Locate the anode rod, which is typically found on the top or side of the water heater tank. It’s usually marked by a hexagonal plastic cap.
- Turn off the gas or electricity supply to the water heater, depending on the fuel source.
- Shut off the cold water supply to the tank and open a nearby hot water faucet to relieve pressure.
- Drain a few gallons of water from the tank using the boiler drain at the bottom.
- Use the pipe or adjustable wrench to loosen and remove the anode rod.
- Wrap several layers of Teflon tape around the threads of the new anode rod.
- Carefully insert the new anode rod and hand-tighten it into the tank, then use the wrench to tighten it an additional half-turn.
- Close the drain valve, turn on the cold water supply, and check for any leaks around the new anode rod.
- Restore power or gas to the water heater and double-check that it’s functioning properly.
Extending Anode Rod Lifespan
To maximize the lifespan of your anode rod, consider the following tips:
– Material Selection: Choose an anode rod made of a material that is well-suited for your water quality. Magnesium rods are standard, but aluminum or zinc-aluminum rods may perform better in hard water conditions.
– Replacement Interval: As a general rule, you should replace the anode rod every 3-5 years, or as recommended by the water heater manufacturer. In areas with highly corrosive water, you may need to replace it more frequently.
– Regular Inspection: Make it a habit to inspect the anode rod at least once a year, looking for signs of significant corrosion or depletion. This will help you determine when it’s time for a replacement.
By following these DIY anode rod replacement tips, you can help extend the lifespan of your water heater and avoid costly repairs or premature replacement. Remember, if you’re ever unsure about the process or encounter any difficulties, it’s always best to consult a professional plumber for assistance.
For more information on water heater maintenance, plumbing solutions, and installation techniques, be sure to visit waterheaterpick.com. Their team of experts is dedicated to providing homeowners with the resources and guidance they need to keep their water heating systems running at peak performance.
Tip: Flush your water heater tank at least once per year

