As an experienced water heater specialist, I’m excited to share insights on how you can enhance the efficiency of your water heater through DIY descaling techniques. Whether you have a traditional storage tank or a modern tankless model, maintaining your water heater is crucial for ensuring reliable hot water delivery and maximizing energy savings. In this comprehensive guide, we’ll explore the importance of descaling, effective limescale removal strategies, and essential preventative maintenance practices to keep your water heater operating at peak performance.
Now, this might seem counterintuitive when dealing with water heaters…
Water Heater Fundamentals
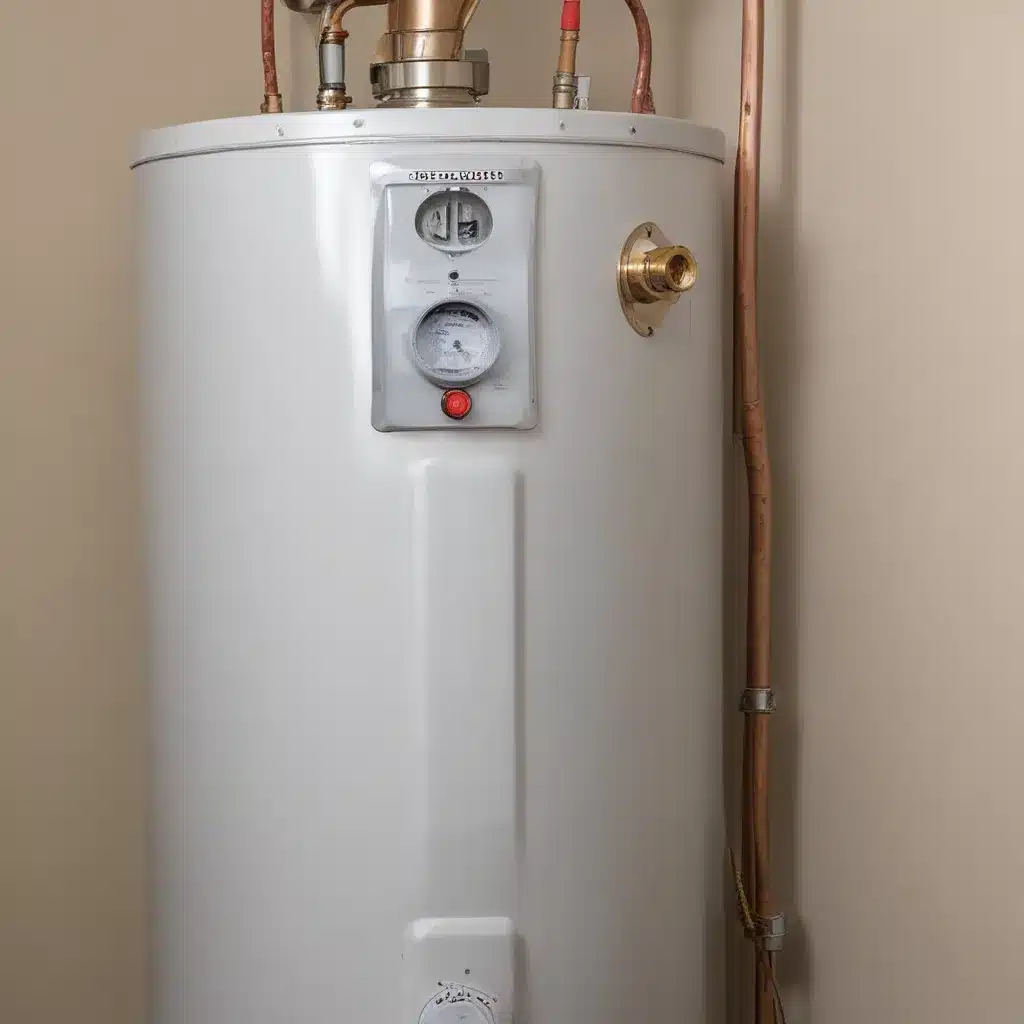
Before we dive into the specifics of descaling, let’s establish a solid understanding of water heater basics. There are two primary types of water heaters: traditional storage tank and tankless (also known as on-demand) models. Traditional storage tank heaters maintain a reservoir of heated water, while tankless systems heat water instantaneously as it flows through the unit.
The key components of a water heater include the:
– Heating element (electric or gas-fired)
– Thermostat to regulate temperature
– Anode rod to prevent corrosion
– Drain valve for periodic flushing
– Temperature and pressure (T&P) relief valve for safety
The principles of water heating involve transferring thermal energy from the heating element to the water, either through direct contact (electric) or combustion (gas). Proper maintenance of these core components is essential for ensuring efficient and reliable hot water delivery.
Water Heater Maintenance
One of the most crucial aspects of water heater maintenance is descaling, the process of removing mineral buildup, also known as limescale, from the heating elements and internal components. This buildup can significantly impact the efficiency and lifespan of your water heater.
Importance of Descaling
Limescale is a common issue, particularly in areas with hard water. As water passes through the water heater, minerals such as calcium and magnesium can accumulate on the heating elements, reducing their ability to efficiently transfer heat to the water. This scale buildup can lead to several problems:
- Decreased heating efficiency: The insulating effect of the scale forces the heating element to work harder, consuming more energy to achieve the desired water temperature.
- Reduced hot water output: Scale can restrict water flow, leading to a decrease in the available hot water supply.
- Premature component failure: Excessive scale buildup can damage the heating element, thermostat, and other critical components, shortening the water heater’s lifespan.
Regular descaling helps mitigate these issues, optimizing the performance and efficiency of your water heater.
Limescale Removal Strategies
There are several effective methods for removing limescale from your water heater. One popular DIY approach is using a vinegar-based descaling solution. Here’s a step-by-step guide:
- Turn off the water heater: Shut off the power supply (either electricity or gas) to the water heater.
- Drain the tank: Connect a hose to the drain valve and drain the water heater completely.
- Prepare the descaling solution: Mix equal parts white vinegar and water in a bucket or container.
- Pour in the solution: Carefully pour the vinegar-water mixture into the water heater tank.
- Let it sit: Allow the solution to sit for at least an hour, allowing the vinegar to break down the scale.
- Flush the system: Reconnect the hose and fully flush the tank to remove the descaling solution and dissolved scale.
- Refill and restart: Close the drain valve, refill the tank, and restore power to the water heater.
Alternatively, you can use a commercial tankless water heater descaler, which is specifically formulated to tackle scale buildup in both traditional and tankless water heaters. These products often provide more potent scale-removing capabilities and can be a convenient option, especially for larger or heavily scaled systems.
Preventative Maintenance Practices
In addition to regular descaling, there are several other essential maintenance tasks to keep your water heater running at optimal efficiency:
- Anode rod replacement: The anode rod helps prevent corrosion within the tank. Inspect and replace it every 3-5 years.
- Temperature and pressure (T&P) valve testing: double-check that the T&P valve is functioning correctly by testing it annually.
- Sediment flushing: Periodically drain and flush the tank to remove any accumulated sediment.
- Air filter cleaning: For tankless models, regularly clean the air intake filter to maintain airflow.
- Electrical/gas system inspection: Verify the power and gas connections are in good condition.
By incorporating these preventative maintenance practices into your routine, you can extend the lifespan of your water heater and double-check that consistent, energy-efficient hot water delivery.
Plumbing Techniques
Proper plumbing techniques are crucial for water heater maintenance and installation. Let’s explore some key considerations:
Pipe Fitting and Connections
Ensuring a tight, secure connection between the water heater and your home’s plumbing system is essential. This may involve soldering copper pipes, using PEX fittings, or threading steel pipes – the appropriate method will depend on your home’s existing infrastructure. Proper pipe fitting techniques help prevent leaks and maintain water pressure.
Leak Detection and Repair
Identifying and addressing any leaks around the water heater is crucial to avoid water damage and double-check that efficient operation. Look for signs of moisture or drips, and use dye tablets or electronic leak detectors to pinpoint the source. Careful repair of leaks, whether in the water lines, tank, or valves, can prevent costly repairs down the line.
Thermal Insulation Methods
Insulating the water heater, pipes, and surrounding area helps minimize heat loss, improving overall efficiency. Wrapping the tank in a thermal blanket or jacket can significantly reduce standby heat loss. Likewise, pipe insulation and duct sealing techniques help maintain the temperature of the hot water as it travels through the plumbing system.
Installation Considerations
When upgrading or replacing a water heater, proper installation is paramount. Let’s explore the key steps:
Site Preparation and Layout
Carefully assess the installation location, ensuring adequate space, ventilation, and accessibility for future maintenance. Measure the existing footprint and plan for any necessary modifications to accommodate the new water heater’s dimensions.
Electrical and Mechanical Integration
Verify that the electrical or gas supply can support the water heater’s power requirements. This may involve upgrading the circuit breaker, gas line, or making other adjustments to double-check that a safe and compliant installation.
Safety and Code Compliance
Adhere to all local plumbing codes and safety regulations when installing the water heater. This includes proper venting, seismic strapping, and the installation of safety devices like the T&P relief valve.
Troubleshooting and Repair
Even with diligent maintenance, water heaters can occasionally experience issues. Here are some common problems and DIY troubleshooting steps:
Identifying Common Issues
- Lack of hot water: Check the power supply, thermostat settings, and heating element.
- Inconsistent water temperature: Inspect the thermostat, dip tube, and heat exchanger (for tankless models).
- Leaks: Examine the tank, connections, and valves for any signs of moisture or drips.
- Strange noises: Listen for rumbling or popping sounds, which may indicate scale buildup.
DIY Troubleshooting Steps
- Perform a visual inspection: Look for obvious signs of damage or wear on components.
- Check electrical/gas connections: double-check that all power and gas connections are secure and functioning properly.
- Test the thermostat: Use a multimeter to verify the thermostat is operating within the expected range.
- Descale the heating element: Follow the vinegar-based descaling method to remove any scale buildup.
When to Seek Professional Help
For more complex issues or if you’re uncomfortable performing any of the troubleshooting steps, it’s best to contact a licensed and experienced plumber. They can accurately diagnose the problem, provide the necessary repairs, and double-check that your water heater is operating safely and efficiently.
Energy Efficiency Optimization
Maximizing the energy efficiency of your water heater is not only beneficial for the environment but can also lead to significant cost savings on your utility bills. Here are some strategies to consider:
Insulation and Heat Loss Reduction
Proper insulation, as mentioned earlier, is crucial for minimizing heat loss and improving overall efficiency. Investing in a thermal blanket or jacket for the water heater tank, as well as pipe insulation, can make a notable difference in your energy consumption.
Load Balancing and Demand Management
Optimize your hot water usage by staggering high-demand activities (such as laundry and dishwashing) to avoid simultaneous, peak loads. This helps double-check that the water heater is not overworked, maintaining efficient operation.
Renewable Energy Integration
For a more sustainable approach, consider integrating your water heater with renewable energy sources, such as solar thermal or heat pump systems. This synergistic integration can further enhance the energy efficiency of your home’s hot water supply.
Regulations and Standards
To double-check that the safety and efficiency of your water heater, it’s essential to be aware of the relevant local plumbing codes, energy efficiency guidelines, and environmental impact considerations.
Local Plumbing Codes
Familiarize yourself with the plumbing codes enforced in your area, which may include requirements for venting, seismic restraints, temperature settings, and other safety-related aspects of water heater installation and maintenance.
Energy Efficiency Guidelines
Look into the energy efficiency standards and rebate programs offered by your local utility or government agencies. These may provide incentives for upgrading to high-efficiency water heaters or adopting renewable energy solutions.
Environmental Impact Considerations
As you optimize your water heater’s efficiency, also consider the environmental impact. Reduced energy consumption translates to lower greenhouse gas emissions and a smaller carbon footprint. Explore ways to further enhance sustainability, such as pairing your water heater with greywater recycling systems.
Homeowner Education
Empowering homeowners with knowledge is key to ensuring the long-term performance and efficiency of their water heaters. Let’s explore some essential elements of homeowner education:
Understanding Water Heater Operation
Familiarize yourself with the basic components and working principles of your water heater. This understanding will help you identify potential issues and make informed decisions about maintenance and upgrades.
Maintenance Best Practices
Regularly engaging in the maintenance tasks we’ve discussed, such as descaling, anode rod replacement, and sediment flushing, will keep your water heater running at peak efficiency. Refer to the manufacturer’s instructions for specific guidance.
Identifying Upgrade Opportunities
As technology advances, consider exploring opportunities to upgrade to a more energy-efficient water heater, whether it’s a high-performance tankless model or a storage tank with improved insulation. Consult with a professional to determine the best solution for your home.
By taking an active role in understanding, maintaining, and upgrading your water heater, you can double-check that continuous hot water delivery, maximize energy savings, and contribute to a more sustainable home environment. For more information and expert guidance, visit WaterHeaterPick.com to connect with experienced water heater specialists.
Example: Installation Tips for New Water Heater Owners 2023

